Fitzski's 2004 Volkswagen Jetta TDI

2004 VW Jetta TDI

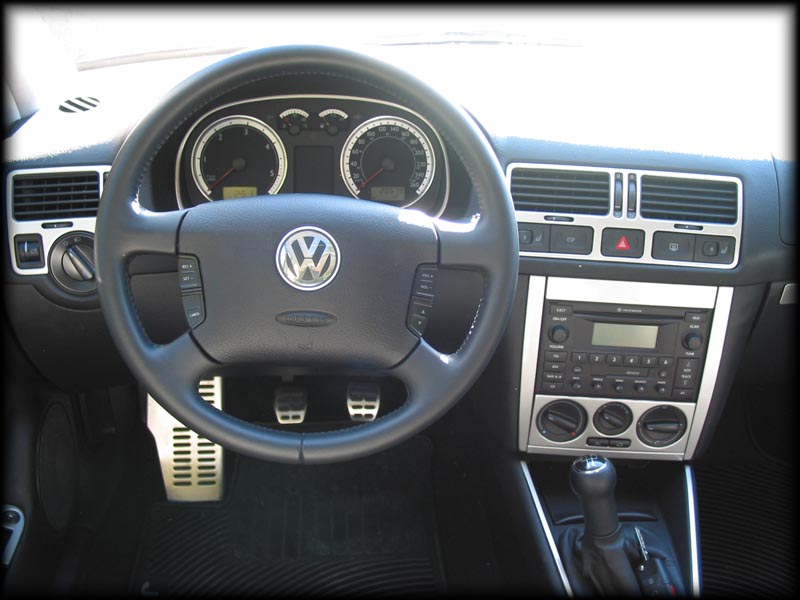
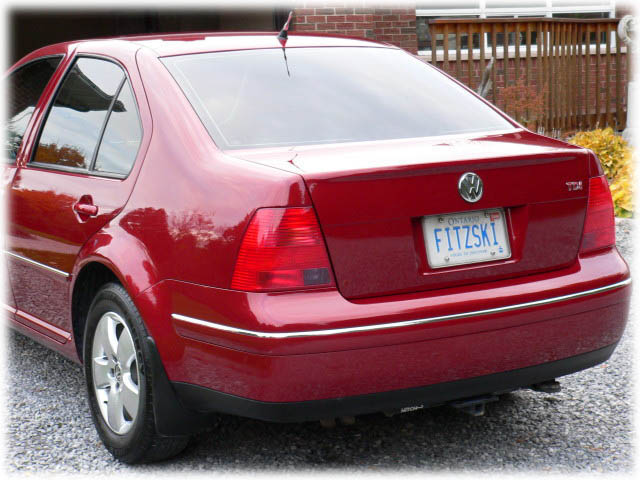
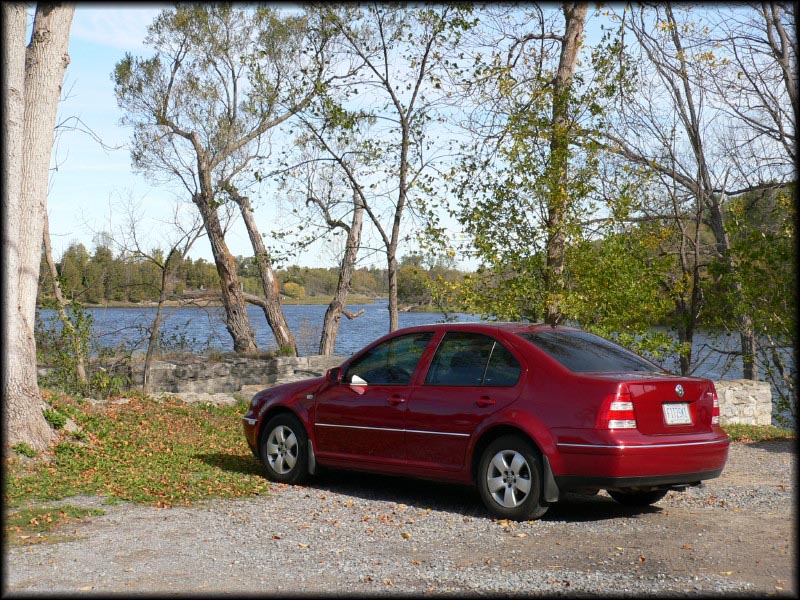
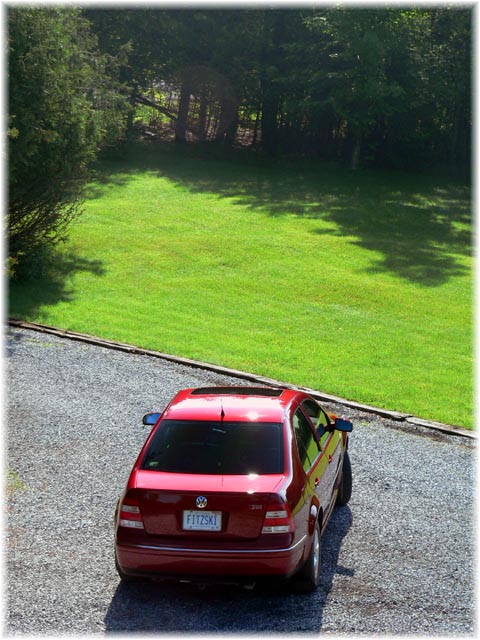
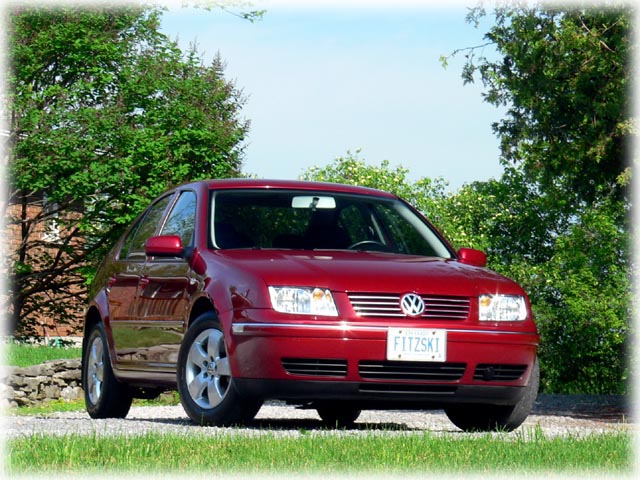
This is our first Volkswagen, and our first diesel. The 2004 model year introduced some key changes to the A4 (aka Mark IV, MkIV, Mk4) Jetta platform, most notably the 1.9L pumpe-duse ("PD"), or unit-injection, diesel motor. Other changes were cosmetic - chrome side and front grill trim, clear tail lights, and a modest lip spoiler on the trunk.

2004 Jetta TDI GLS

From the factory:


Annual Fuel Economy Summary

Blue Car
  Odometer
(km, at year end)
Distance
(km)
Litres L/100km MPG (US) MPG (UK) Cost Cost/L Cost/100km
2008 Totals 81,8741 18,159 876.4 4.83 48.7 58.5 $1,054.56 $1.203 $5.80
2009 Totals 108,467 26,593 1,400.6 5.27 44.7 53.6 $1,205.41 $0.861 $4.53
2010 Totals 132,832 24,365 1,233.8 5.06 46.4 55.8 $1,228.78 $0.991 $5.01
2011 Totals 162,180 29,348 1,652.3 5.63 41.8 50.2 $2,013.47 $1.219 $6.86
LIFETIME 162,180 98,465 5,163.1 5.24 44.9 53.9 $5,496.22 $1.065 $5.60
1 This car was purchased used, with 63,715km on the odometer.
Red Car
  Odometer
(km, at year end)
Distance
(km)
Litres L/100km MPG (US) MPG (UK) Cost Cost/L Cost/100km
2004 Totals 28,8081 8,241 510.1 6.19 38.0 45.6 $397.92 $0.780 $4.83
2005 Totals 67,542 38,734 2,149.0 5.55 42.4 50.9 $1,909.95 $0.889 $4.93
2006 Totals 98,681 31,139 1,611.6 5.18 45.4 54.5 $1,513.29 $0.939 $4.83
2007 Totals 124,784 26,103 1,472.4 5.64 41.7 50.1 $1,422.64 $0.966 $5.45
2008 Totals2 128,900 4,116 229.3 5.57 42.2 50.7 $254.36 $1.109 $6.18
LIFETIME 128,900 108,333 5,972.3 5.51 42.7 51.2 $5,489.36 $0.919 $5.07
1 This car was purchased used, with 20,567km on the odometer.
2 This car was involved in an accident on March 19th, 2008 and was totalled.

Fuel Economy Milestones

  Red Car
Blue Car
Longest single trip distance: 1,244km (773 miles) 1,404km (872 miles)
Best single trip mileage: 4.58L/100km (51.3 US MPG) 4.17L/100km (56.4 US MPG)
Largest fill-up: 59.4L (15.7 US G) 59.0L (15.6 US G)
Click icons for data at Fuelly: Fuelly Fuelly

Modifications


Brushed Aluminum Trim Kit

A factory available accessory kit that nicely brightens up the interior. The kit is peel-and-stick, and is well done - it fits nicely, doesn't interfere with the removal of any interior panels, and doesn't rub or creak.

The kit includes 22 individual pieces:


Audi TT Aluminum Pedals
 

Monster Mats
 

Heavy-duty rubber floor mats (set of 4). Great winter protection from the slush and salt that would quickly destroy the carpets and summer floor mats.

References:
VW Driver Gear


CCFL Trunk Lighting
 

The factory trunk light is simply pathetic, and now with dual white CCFL (Cold Cathode Flourescent Light) tubes, I have no problem seeing anything in the trunk, and for less than $20 from any computer shop. These lights are Cooler Master Ultra Aurora CCFLs, and I went with white (DFL-UDI-EW), as visibility was my top priority. A range of colours are available (including ultraviolet!) if you want a bit more style at slightly reduced light output.

I tapped the OE trunk light plug (make sure you get the polarity correct), so the lights are switched on with the trunk opening. The tubes are easily mounted with strong double sided padded tape - more than enough to hold the very lightweight tubes. I had to extend the wires by splicing in 8" or so in order to reach the inverter, which is mounted (with double sided tape) in a cavity behind the carpet above the left rear wheel well.

References:
Cooler Master
TDI Club: Cold Cathode Trunk Light
TDI Club: Trunk Light Upgrade


Keyless Remote Antenna Upgrade
 

Previously, with the keyless remote, you had to be within 2' to 3' of the car for the remote to work, and I found that unsatisfactory in a number of situations. This mod essentially replaces the existing antenna by installing a new, longer antenna wire and re-routing it along the top of the car. After the mod, the remote works up to 100' away; it is especially useful if you also have an Alientech or Auto Window power window controller installed.

The harness is located above the driver's side footwell; you have to remove a few panels to gain access (see References, below). You can either unplug the factory antenna wire or just tap into it with a new wire. Unplugging is easier and neater - assuming you have a tool for removing the wire terminal from the connector plug. I manufactured my own tool from an old pair of tweezers. I ran the wire up the driver's side A-pillar, across the top of the doors, and into the corner of the rear deck - there is a piece of trim the whole way along the car that you can easily tuck the wire into.

References:
VW Vortex: Does your Remote only work close to the car?
VW Vortex: Removing interior parts, Part II
Alientech
Auto Window


Phatnoise Phatbox
 

References:
Phatnoise
Phat-Hack


Infinity Kappa 60.5CS
 

An upgrade to the front speakers. These Kappa's are component speakers with 6.5" woofers going in the doors, tweeters in the A-pillars, and the crossover behind each door panel. At this point I have not upgraded the factory head unit (Premium VI, non-Monsoon) or added an amplifier. As such, I simply tapped the existing speaker lines for the crossover input, and ran new cables to each component.

References:
Infinity Car Audio
VW Vortex: Removing front door parts

Images:

Door Panel Crossover Woofer

Figure 1

Everything is easily accessible once the door panel is removed. Split loom for the wiring keeps everything neat and tidy.

Figure 2

I determined the crossover location using a template made from styrofoam, to make sure it wouldn't interfere with the mounted door panel. Since the door cover is not flat, the crossover is mounted on "posts" cut from the body of a plastic pen.

Figure 3

Two layers of 5/8" MDF "doughnuts" were used to space the woofer from the door panel and prevent it from interfering with the lowered window.


Aspherical Rear View Mirrors
 

A safety upgrade that replaces the North American-spec rearview mirrors with the European-spec aspherical (or "dual-zone") mirrors. The NA-spec drivers side mirror is "flat" - there is no curve to the mirror to expand the viewing angle. While this yields a direct and accurate image, it is a small image that leaves a large blindspot.

The Euro-spec mirror is flat on the inner 2/3rds of the glass, but the outer 1/3rd is convex, and greatly extends the viewing angle into the left lane, including two lanes over. The potential trade-off is in judging distance and speed - as with the passenger mirror, "Objects may appear smaller than they actually are", so there is a small learning curve to using the aspherical mirrors effectively. Both the Euro- and NA-spec passenger mirrors are the same, i.e. convex. The Euro-spec mirrors are also tinted blue, which greatly reduces glare during night time driving. The only issue I've noticed is that the Euro-spec mirrors, because of the blue tint, are a bit more difficult to use when they are wet or dirty. Overall, however, a worthwhile and easy upgrade. Check the references below for installation information.

There are also a couple of options when looking for mirrors. First, you have the option of a passenger side mirror without the "Objects may appear..." warning printed on the bottom. Second, you can get an aspherical passenger side mirror, basically a "driver's side mirror" made for a right-hand drive car.

References:
TDI Club: Euro Convex Side Mirrors | Fitzski's install post

Images:

Crossover Woofer Woofer

Figure 1

The motor mount for the mirror. Note the heater wires that need to be reconnected before mounting the new mirror, and the rubber boot, which should fit over the plastic ring on the back of the new mirror as well.

Figure 2

Mirror cover removed, showing the spring tab that the cover clips onto.

Figure 3

Detailed image of how the plastic backing of the mirror aligns itself to the motor mount and clips on.


  Mirrors Before and After  
 

Figure 4

Before and after images with NA-spec and Euro-spec driver's side mirror.


Hella Supertone Horns
 

A rather gratuitous upgrade, but one that puts a smile on my face whenever I use the horn. There's certainly nothing wrong with the OE horns, but these definitely add more punch and recognition. Very affordable, and adds undeniable safety in an environment increasingly filled with drivers who pay less and less attention to driving. The Hella Twin Supertone Horn part number is 85115. The kit includes two horns (500Hz and 300Hz) with mounting posts (but no hardware), and a relay.

References:
TDI Club: Hella Supertone Horns | Fitzski's install post
Hella Twin Supertone Horn Kit

Images:

Supertone horn wiring diagram Horn mount Relay mount

Figure 1

Supertone horn relay wiring diagram. The diagram does not show a fuse on the 12V feed from the battery, but I did put one in (30A).

Figure 2

I bolted right angle brackets to the steel bumper. The mounting post on the horn gets bolted to this.

Figure 3

The relay is mounted on the back left side of the steel bumper, in front of the OE horn location. Lots of space, and easy access to the OE horn wiring harness and a good ground point.


Horns attached to bumper Horns behind centre grill

Figure 4

The horns mounted on either side of the steel bumper. Power wire is shown. Note that I rotated the mounting post so that the connections were at the "top".

Figure 5

Horns installed. They do not block much of the radiator, are fairly well protected from weather, and are open enough that they are not muffled.


Stubby Aluminum Antenna
 

References:


VW Logo Tire Valve Stem Caps
 

A nice little touch, that was STOLEN off of our car, probably during our east coast trip in Summer 2005. Grrrrrrr....


Hidden Hitch Trailer Hitch (and OE-style wiring harness)
 

There are a handful of MkIV hitch options, including Reese, Draw-Tite, and Hidden Hitch. If you have the means, the Euro OE-spec Bosal hitch is very nice, and has a price reflective of its engineering. The North American hitches all require drilling through the trunk floor for mounting. They are all Class I hitches, rated to 2000lbs with 200lb tongue weight on a 1-1/4" draw bar.

I also wanted a clean wiring installation, so I purchased the OE taillight connectors and spliced them onto a circuit-protected trailer lighting adapter. The unit is mounted in the CD changer cubby, and the flat 4-wire connector is simply run under the closed trunk lid when required. The circuit protector takes power directly from the battery - so I had to run the power wire the length of the car.

References:
Hidden Hitch
TDI Club: Trailer Connections
TDI Club: Installed and used my Hidden Hitch

Images:

Hidden Hitch Package Contents Trunk Mounting Holes Reese Circuit Protector Package Contents

Figure 1

Hidden Hitch #60963 (Jetta sedan, 1999.5-2005). The complete kit.

Figure 2

You must drill 3 holes in the spare wheel well in the trunk, and a fourth hole in the frame rail by the tow hook.

Figure 3

Reese "Tow Power" #74204 Regular Duty Circuit Protector. The complete kit contents.


Light Panel Wiring Diagram Light Panel Connections Reese Circuit Protector Mounted

Figure 4

Rear light panel wiring diagram, with connector part numbers.

Figure 5

Rear light panel connections. Nice and neat, and easy to disconnect to remove the panel and change light bulbs when necessary.

Figure 6

Circuit protector discretely mounted in the trunk cubby hole.


Volkswagen OE Roof Rack
 

References:


Pre-2004 Taillights
 

Pre-2004 taillights As mentioned above, one of the minor cosmetic changes for the 2004 model year were the taillights, which went from more or less all-red, to a red-clear-red-clear ("RCRC") pattern. Just to be different, and because I felt it would look better with the Spice Red, I swapped my stock tails for a set of pre-2004 tails. Going with the all-reds also enables the use of the "5 brake light mod", and the addition of the rear fog lamp. While both of these mods are possible with the RCRC tails, they make more sense with the red lenses. A popular alternative to the 5BL mod on the RCRC's is to double up the reverse lights instead.

References:
TDI Club: Wiring the rear fog with the 5 brake light mod
TDI Club: 2004 tails on a 1999
TDI Club: How to add back-up lights to your 04+


Jack Lift Pads
 

Lift pad installed An easy upgrade that adds the standard Audi TT lift pads to A4/B5 VW models. They plug right into existing holes in the floorpan to give you a safe jack point without damaging the floorpan (or the pinch weld that runs the length of the car). They come as a set of 4, and each "pad" is 2 pieces. There's a large rubber "grommet" and a companion high-density plastic insert that is the jack contact area. Most Audi/VW parts vendors will have them available as a set, or you can get them from your local dealership using the following part numbers.

  • 8N0 804 583 (grommet) (4 required)
  • 8N0 803 855 (rigid insert) (4 required)

References:
OVD: MkIV/B5 Lift pads/Jack pads
TDI Club: Lift pads for Audi TT fit the Jetta, Golf, New Beetle and Passat


5.5L Windshield Washer Fluid Reservoir
 

MkIV VWs that are not equipped with headlamp washers get saddled with a paltry 3L fluid reservoir, which is annoyingly small for a few reasons:

  1. You run out of fluid very quickly (and always when you need it... go figure, eh?); more of an issue around Ottawa than other places, I'm sure
  2. You obviously can't empty an entire 4L jug of fluid into it
  3. The warning light didn't seem to provide much warning... When the light came on, that was pretty much it - you were out of fluid.

This upgrade installs the 5.5L reservoir available to headlamp washer-equipped MkIVs (why VW couldn't just put this tank into ALL the vehicles I can't understand), and despite being a tedious, though straightforward, install, is well worth the effort. Now, when the low fluid warning light comes on, I can still empty an entire 4L jug into the reservoir, go about twice as long between fills, and have ample warning when the level gets low.

The 5.5L reservoir part number is 1J0 955 453 L. You will also need a rubber plug, part number 2D0 955 465 B, which plugs the hole that would otherwise be used for the headlamp washer pump. (Of course, instead of the plug, you could install the pump and headlamp washers...)

References:
TDI Club: Upgrade to 5.5 litre washer fluid tank | Fitzski's install post

Images:

5.5L Reservoir Installed Reservoir

Figure 1

The larger reservoir. Much of the tank fits into the fender well (see Figure 2).

Figure 2

Larger reservoir installed. Note the rubber plug in the bottom center of the tank - this is where the headlamp washer pump would go.


Audi TT "Short Shifter"
 

TT Shifter An upgrade that replaces the stock Jetta shift linkage and counterweight with the version from the Audi TT. The only difference between the two pieces is the position of the outer cable attachment point (see photo). Just enough of an upgrade from stock to be noticeable; it tightened the shifter up nicely and feels more solid and comfortable. Side-to-side throw distance is not affected, just fore-aft; no more letting out the clutch too early going for 3rd gear - yay! Part number for 2002+ MkIVs is 8N0 711 051 A, drop the A for earlier cars, which use a different style cable attachment post.

References:
Dieselgeek: Removal of stock shift mechanism


Ventectomy
 

There is a spring-loaded "trap door" at the top of the fuel filler neck. Pushing this trap door open with the tip of the fuel pump provides "venting" for the secondary (expansion) portion of the tank. Since diesel does not change volume according to temperature the way gasoline does, the expansion tank is not needed for that purpose on a TDI. By venting, you can fill the expansion tank with diesel and get another few litres in the tank. The ventectomy procedure simply removes the spring-loaded trap door from the fuel filler neck, facilitating and accelerating the process of filling the tank "to the brim".

References:
TDI Club: Remove the vent guts easily!!!!
GeWilli's Ventectomy Pictorial


CAT 2-micron Fuel Filter
 

The OE Bosch fuel filter is rated at ~10 microns, which is pretty good (a human hair is ~100 microns). But, they are expensive, and are also a routine maintenance item on the TDI (every 32,000km). The CAT fuel filter is a 2-micron unit and is about 1/3 the cost for replacement 1R-0750 filters, in addition to having a service life well in excess of the OE filter - these filters are designed for heavy vehicles which filter a lot more gallons than a VW TDI!. Your engine gets much cleaner fuel (especially important for the PD), and your long-term maintenance costs are reduced.

The upgrade kit, engineered by Lubrication Specialist, includes the custom-made filter head, banjo fittings, O-rings, larger bracket clamp, and CAT fuel filter. Installation is very easy - no more complicated than replacing an OE fuel filter (see the how-to video under References).

References:
TDI Club: CAT Fuel Filter Tests Results
TDI Club: Cat 2 micron fuel filter replacement schedule?
Lubrication Specialist (CAT fuel filter kits for VW)
CinciTDI: VW A4 TDI OEM Fuel Filter to CAT 2 Filter Modification (Video)

Images:

CAT Fuel Filter Package Contents Cat versus Bosch Fuel Filter CAT Fuel Filter Installed

Figure 1

The complete kit. Some components have since been modified/improved on newer kits, notably the thermostatic valve.

Figure 2

The CAT filter is much larger than the OE Bosch unit, and that translates to a much greater filter media surface area.

Figure 3

The CAT filter installed. The filter drops into the OE location and there is just enough clearance to account for its additional length.


Temro ZeroStart Coolant Heater (& lower grill outlet)
 

The diesel engine's efficiency means that little energy, in the form of heat, is lost during combustion. The consequence of this is the length of time it takes for the car to warm up in colder winter temperatures - easily up to 15 or 20 minutes depending on conditions. This is not only uncomfortable for the driver and passengers, but also increases wear & tear on the engine, as the oil takes some extra time to reach optimum temperatures as well. The coolant heater helps out by warming the coolant and circulating it throughout the block. A coolant heater has no moving parts - the heated coolant is circulated via thermal convection. This is not a quick process, and the heater should typically be plugged into a timer, and turned on 2 to 3 hours prior to departure for maximum effect. The car will start *much* easier, and you will have usable cabin heat within a few minutes.

You can either purchase a complete kit (see References below), or source the parts yourself. The heater itself can be purchased through many auto parts suppliers; for the VW, the most common version is 1000W, Temro part number 330-5002 - this version does NOT have a regulating thermostat, which is not required. For the upper coolant hose, you can splice your own together from a couple of right-angle pieces, or you can track down a comparable single piece hose that will just need to be trimmed (shortened) on the ends - use one of NAPA 10785, AC Delco 18044L, Gates 18785, or Dayco 71678.

Installation in the Jetta/Golf is fairly straightforward. On manual cars, the unit gets mounted in the space between the radiator fan and battery, splicing into the lower coolant hose at a level just above the skid plate. Remember when setting the mounting bracket that the heater itself must sit as the lowest point in the coolant system in order for thermal convection to work effectively. Be sure the unit is not resting against anything when you tighten up the mounting bracket. A new upper coolant hose is required to relocate the flow to the heater location. You should probably have some spare G12 coolant on hand to top up whatever might be lost when you splice in the heater - potentially up to ~0.5L, depending on how quick you are! ***Do NOT use any coolant other than G12!***

The final thing I did was to add a more convenient electrical outlet to the left front lower grill, rather than having the heater extension cord flapping around.

References:
TDI Club: TDI heater vs. Zerostart avail. @ Canadian Tire?
TDI Club: Coolant Heater Lower Grill Outlet
GeWilli's Zerostart Installation Pictorial
FrostHeater: Complete Installation Kits

Images:

Coolant Heater Mounting Bracket Marinco Outlet Cat versus Bosch Fuel Filter

Figure 1

Looking straight down, to show the location of the heater mounting bracket, just in front of the battery box. The big green bolt (upper right) holds the battery retention clip.

Figure 2

The Marinco outlet wired with an extension cord lead and fitted into the lower grill outlet.

Figure 3

The Marinco outlet when installed, with the protective flap closed.

Additional References Local Dealers & Shops